For the advanced server setup, we will need 4 VPSs, and 4 domains with 15 additional IPs (5 IPs/SMTP).
Virtual Private Server (VPS)
The configuration of the VPS server should be as follows.
3 Server (for SMTPs):
RAM: >= 2 GB. Server Space: >= 15GB
Operating System: Linux Distribution: Ubuntu 22.04
1 Server (to host the mailing application):
RAM: >= 4 GB. Server Space: >= 40GB
Operating System: Linux Distribution: Ubuntu 22.04
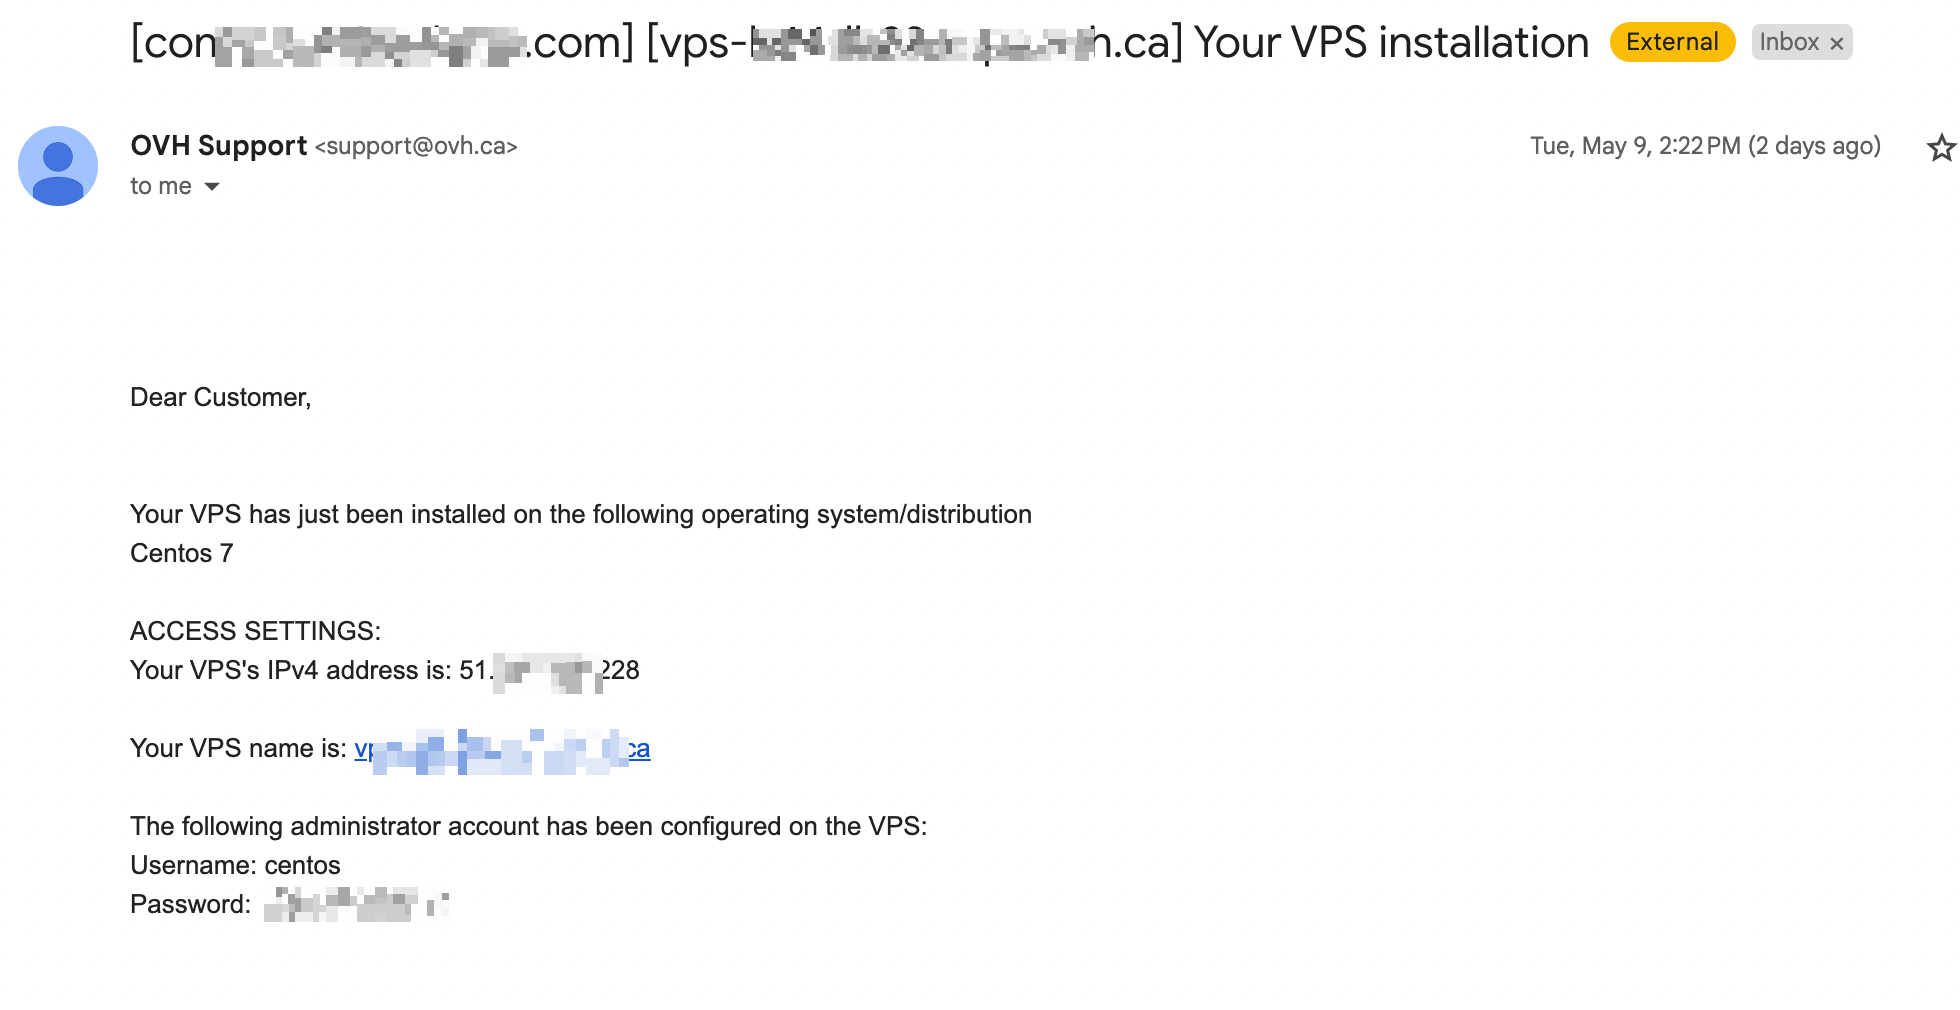
Root access should be needed for this server setup.
We suggested OVH servers since it is comparatively economical.
Moreover, apart from cost the main reason for using is that the OVH is quite lenient toward bulk mailing compared to others, and also they are providing additional IPs without any justification, usually, the other providers may ask the purpose of additional IPs and they won't provide it for bulk mailing.
Please use the following links for purchasing the OVH server.
3 OVH Starter Servers
(For US residents, please use this link)
and
1 OVH Essential Server
(For US residents, please use this link)
Use the following configuration while ordering your server.
3 Starter Servers: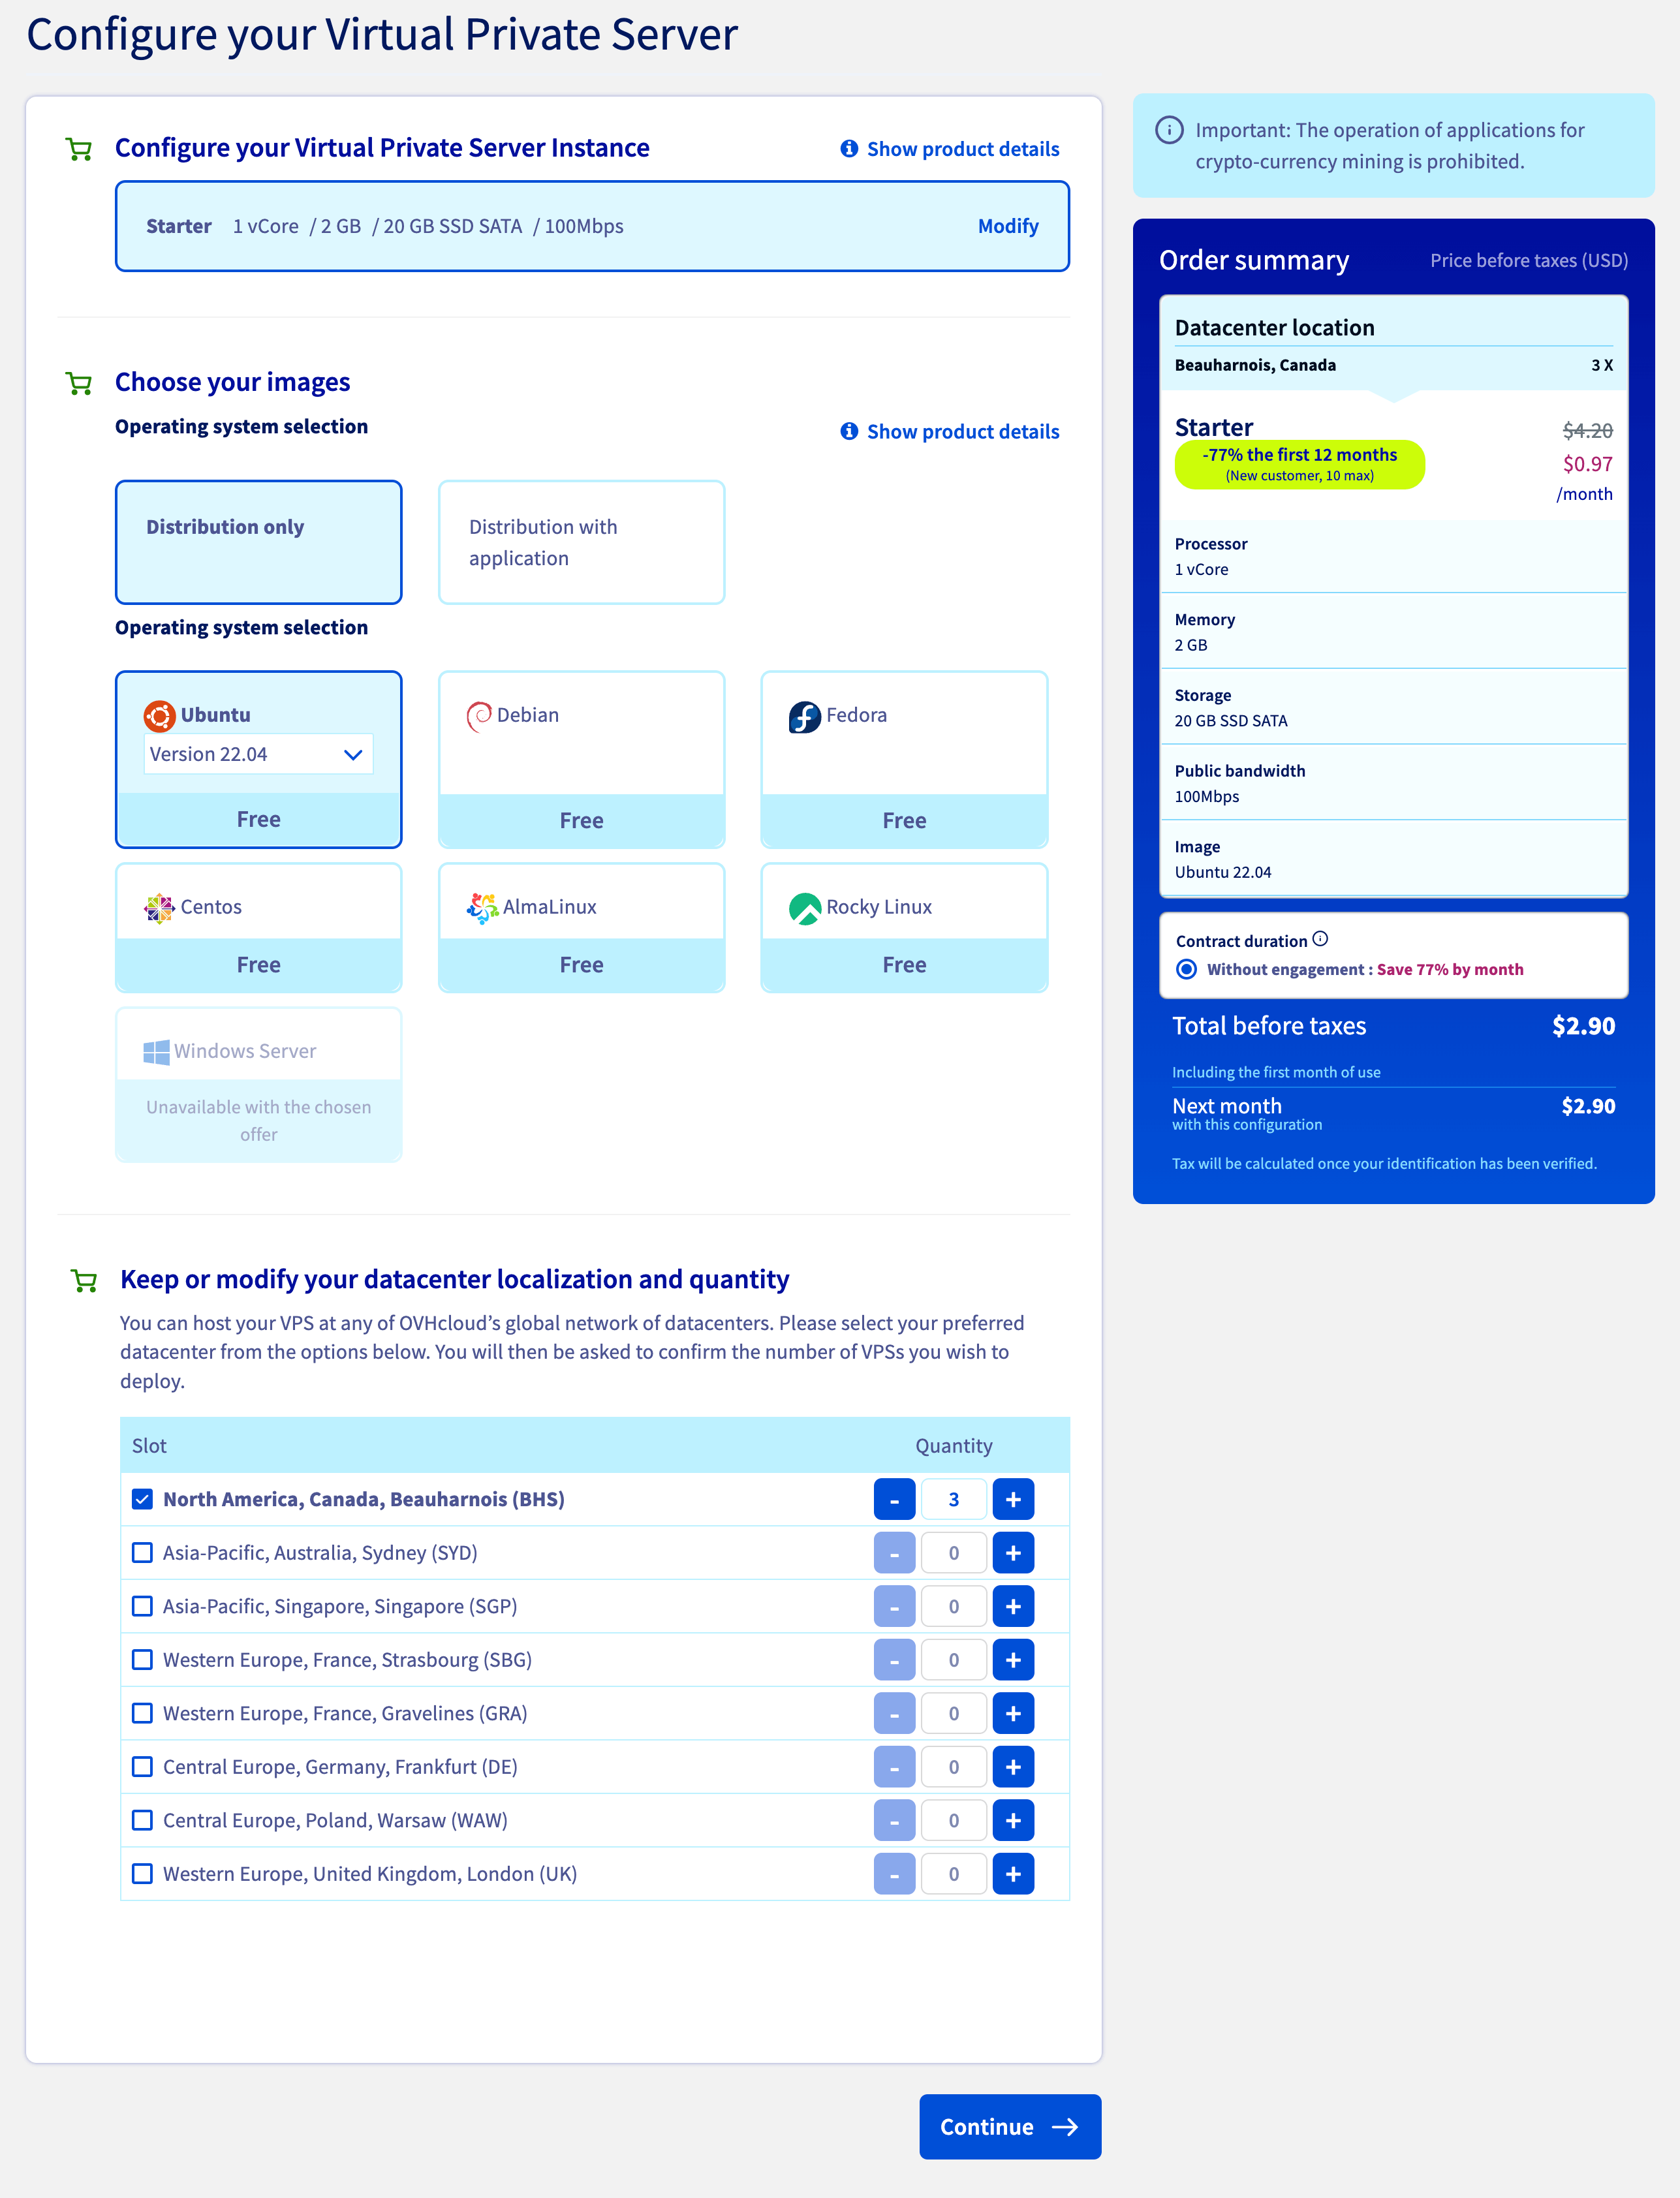
1 Essential Servers: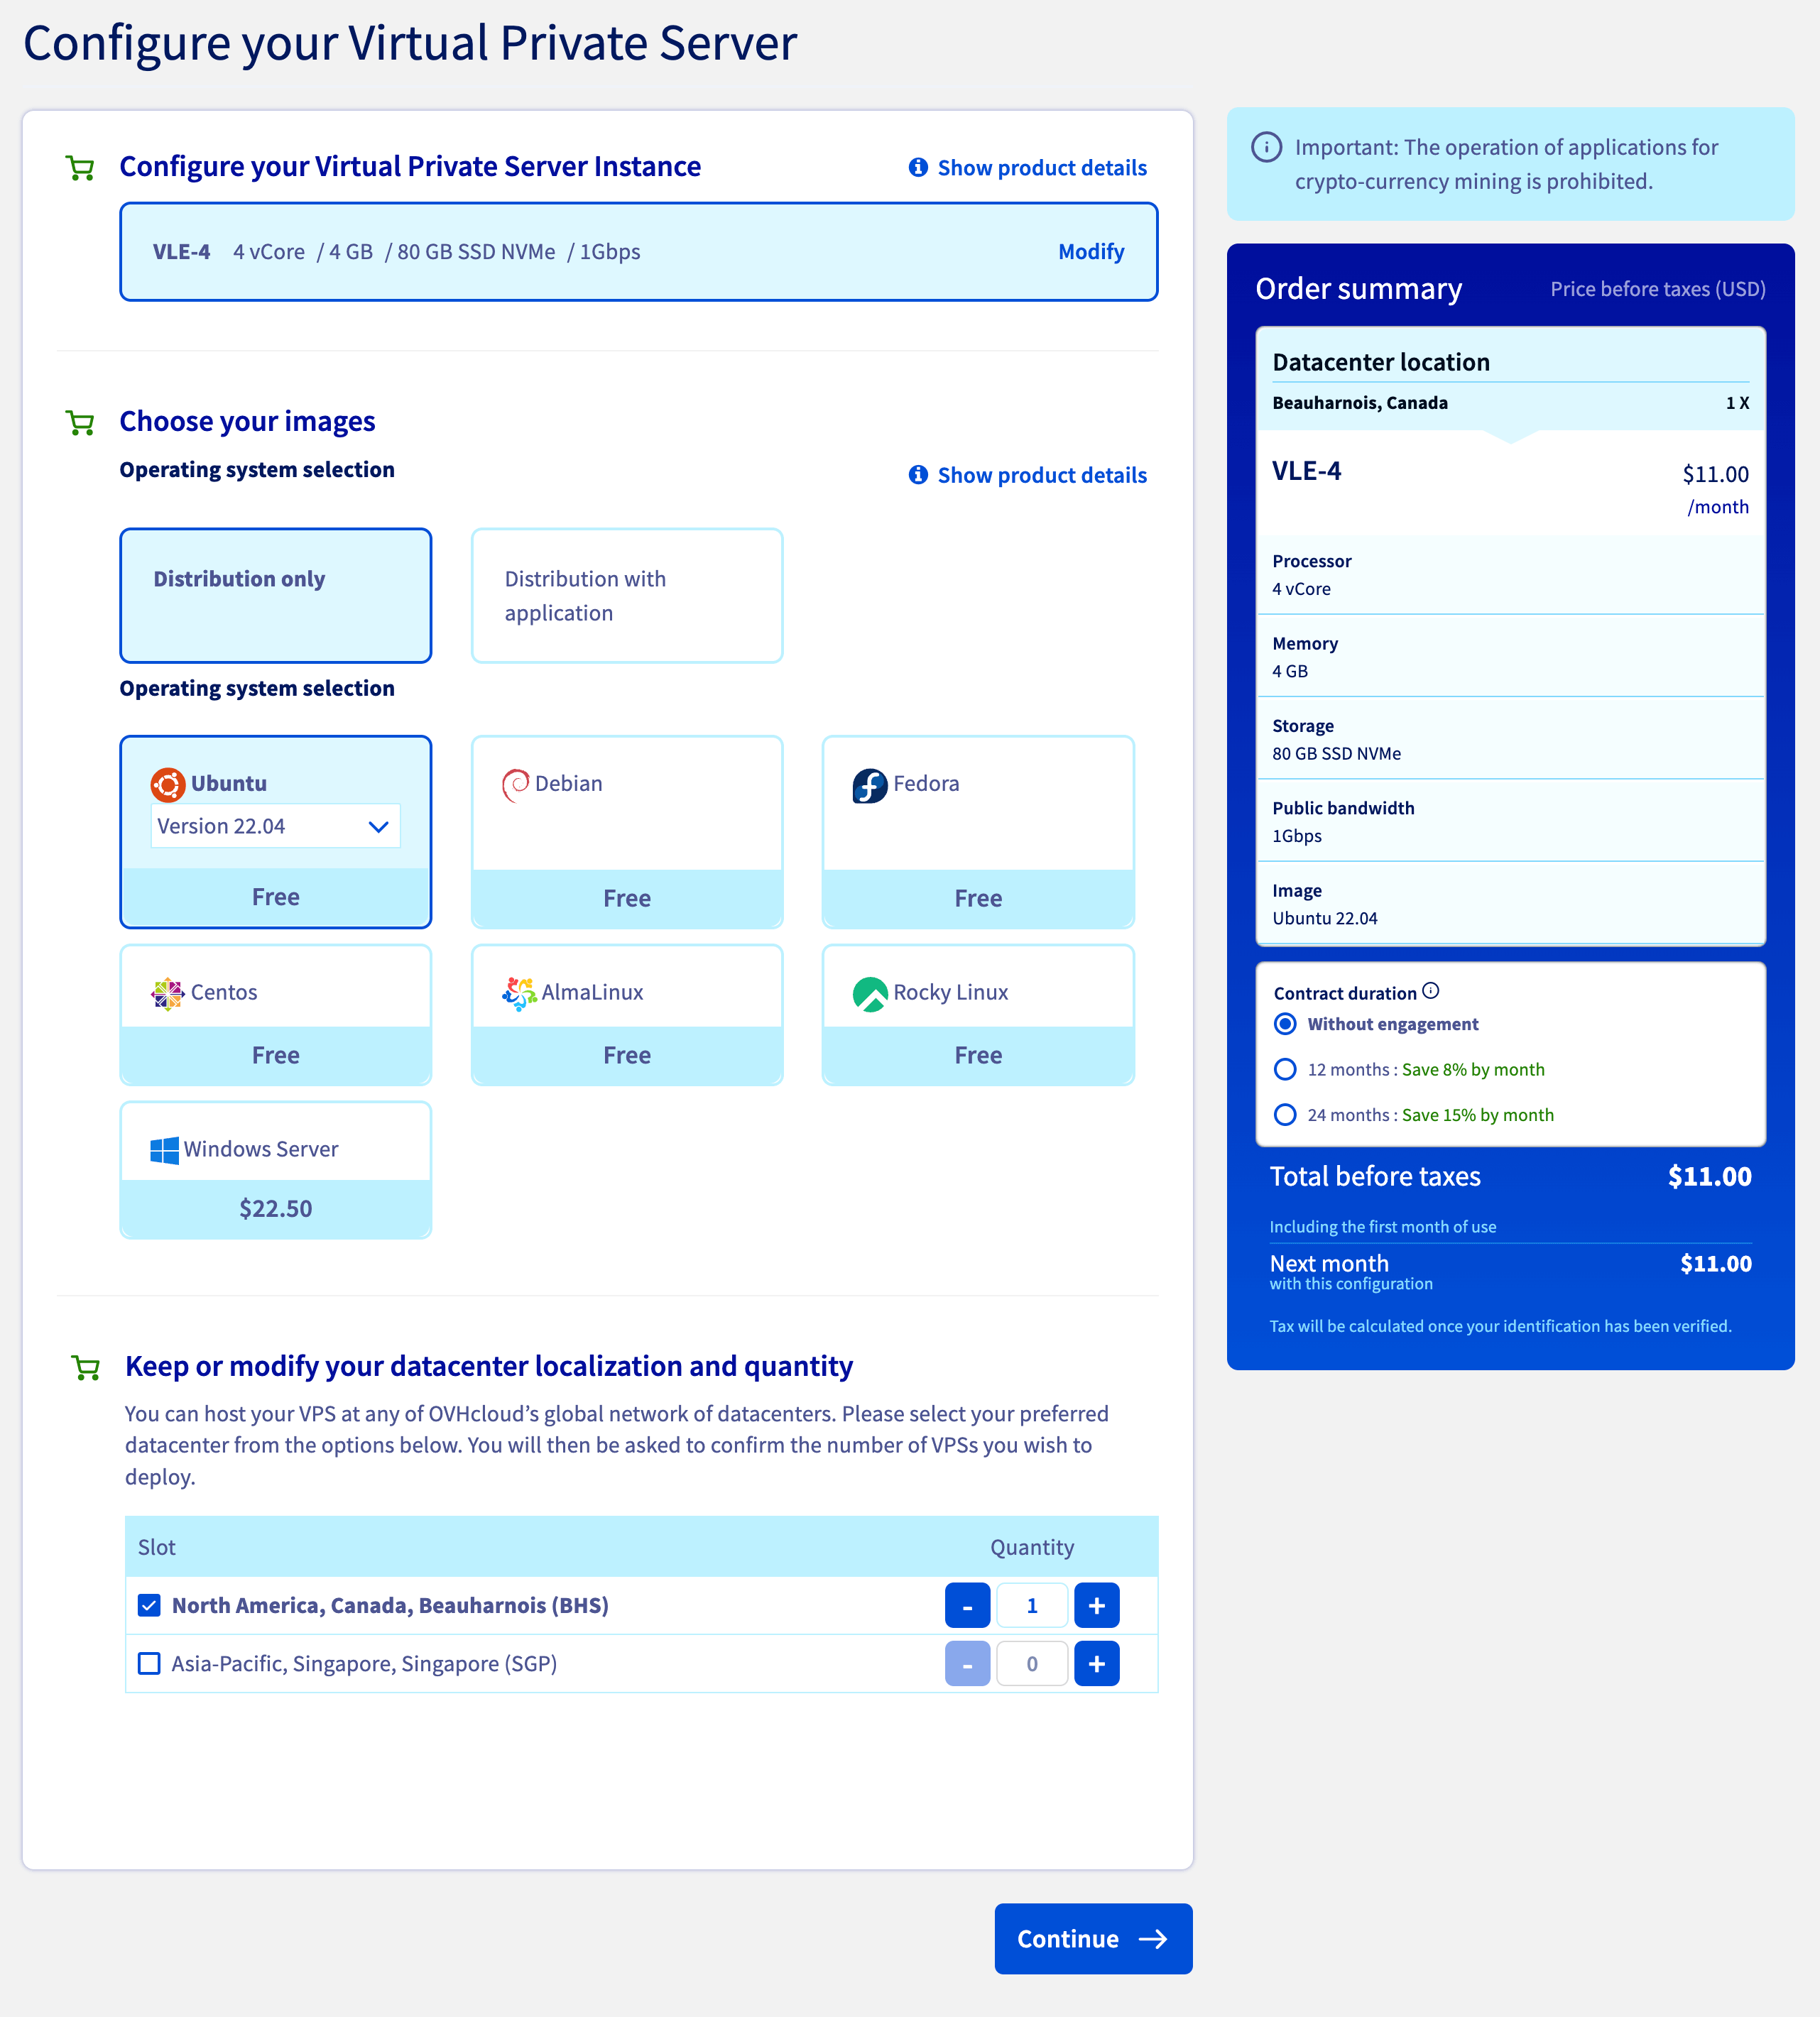
Click on Next, and order your server.
Kindly Note: You have to create your account in OVH first and please provide the correct details since they might ask for the government ID and address proof to verify your identity.
Domain
You can take any 4 (.com) domains for this server setup if you already have a spare domain so that we can use that one or else you can buy a new one from Godaddy.
Do not use your existing domain (on which your website is already running), since we need to use those domains in the server setup and also we need to install the web application on this new domain, so if any website will be running on it, will be affected by these changes.
Although you can use your existing domain while sending emails to your contacts list.
Additional IPs
VPS comes with one default IP and we will need 15 additional IPs (5 IPs for each starter VPS) for this setup.
You can purchase additional IPs, once your OVH VPS account is set up by the OVH team.
OVH Control Panel –> IP Tab –> Order an IP.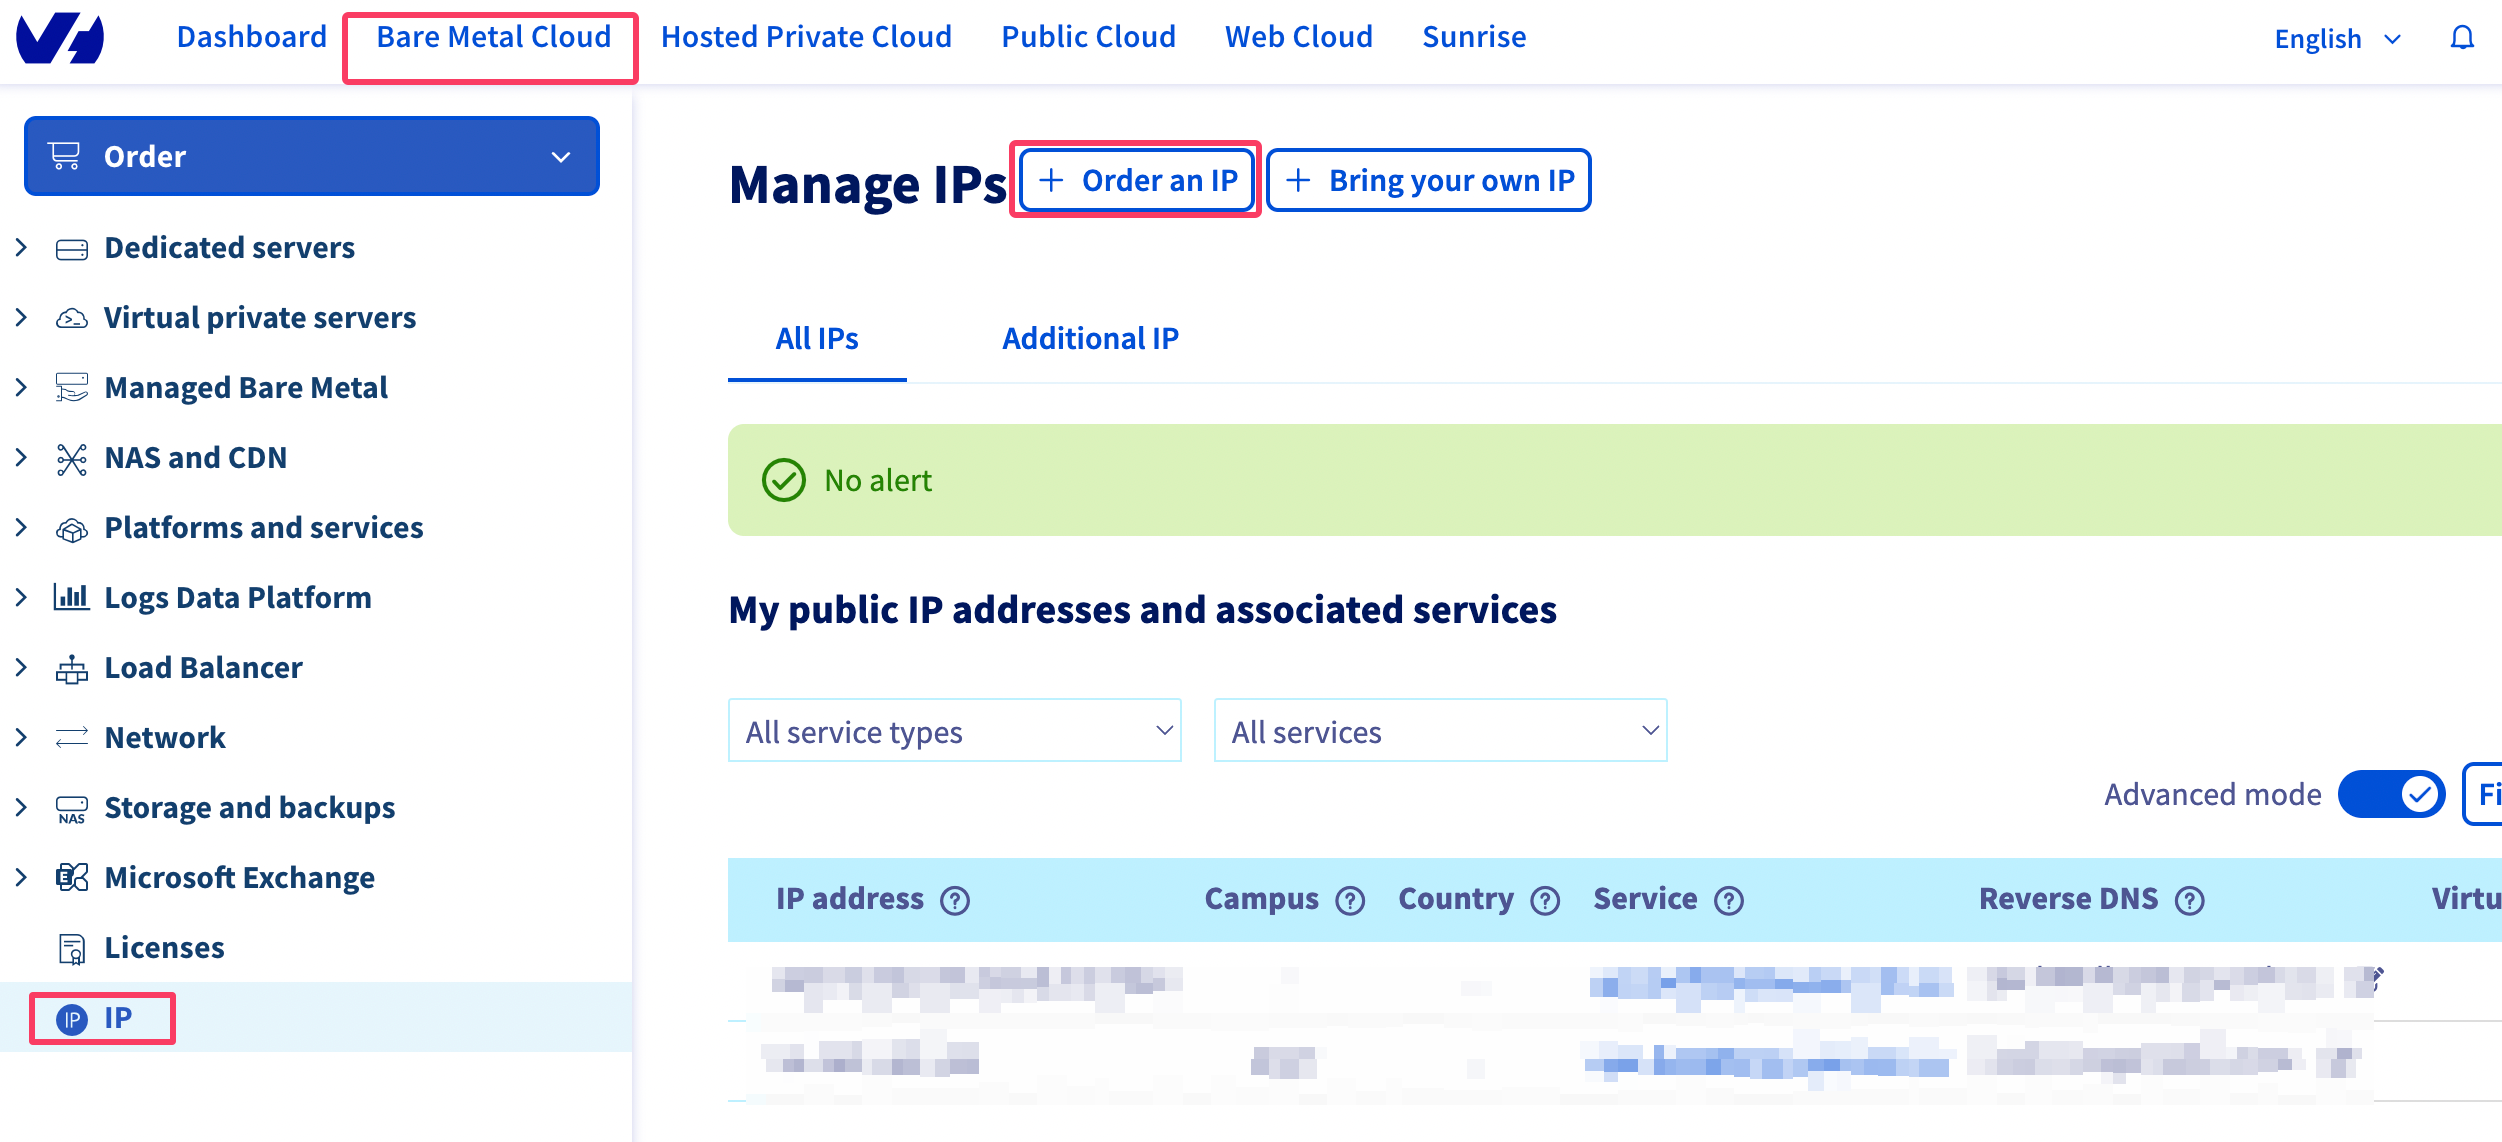
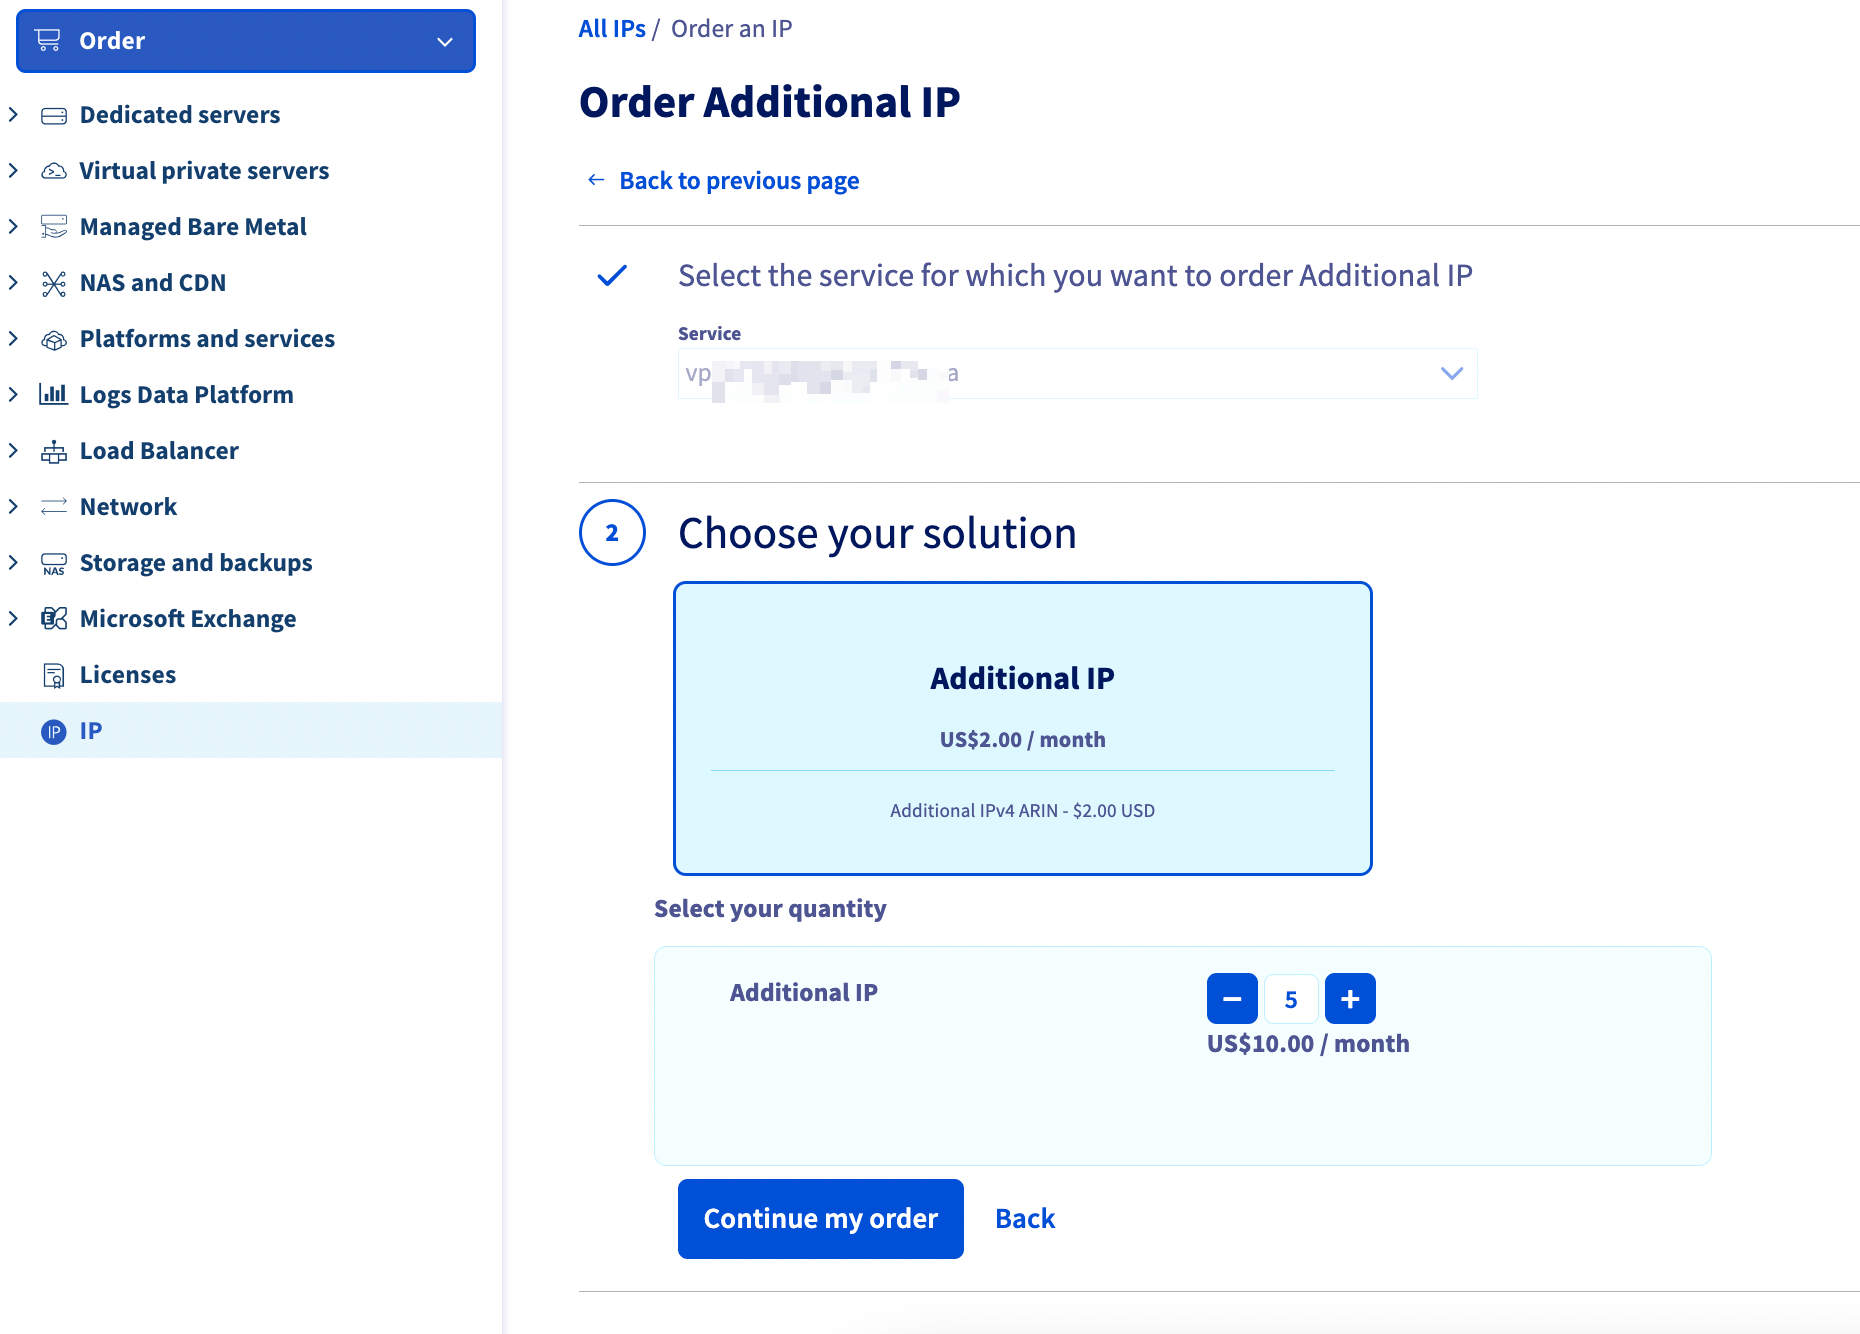
You have to select each starter server one by one and have to order 5 IPs for each of your starter VPS.
After clicking on the next one order number will be generated. Click on that order and you can pay for the IPs there. Your IPs will be ready by the OVH team in a few hours.
Details Needed
We will need the following details for your server setup.
a) Domain control panel details: (Username and password)
b) OVH control panel details: (Username & password)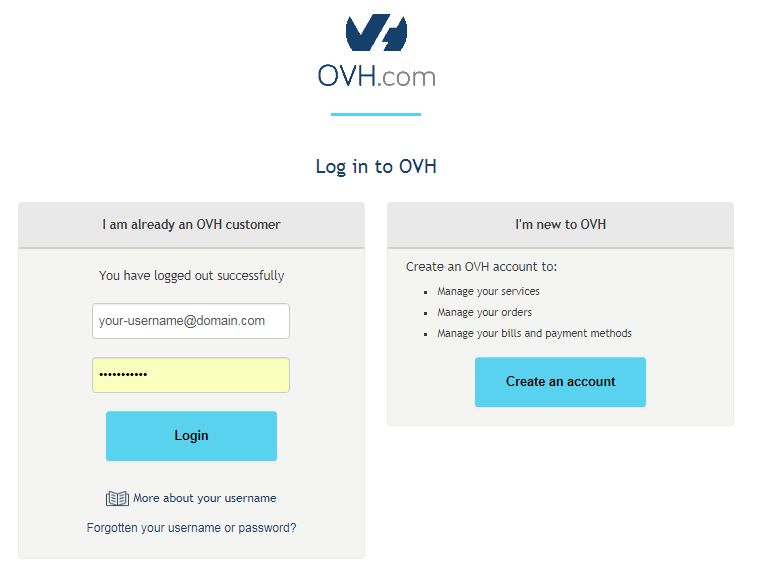
c) Root access to each of your servers.