DNS Changes for the domain in HostGator

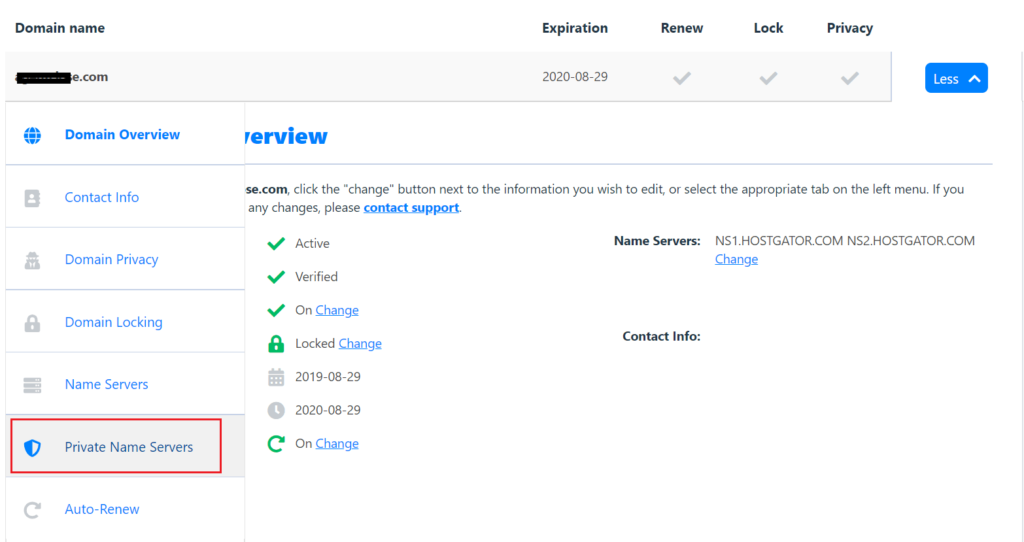
Go to the following location in your account
Click on the More button in front of your domain as follow.

Go to the Private Name Server tab as follows.
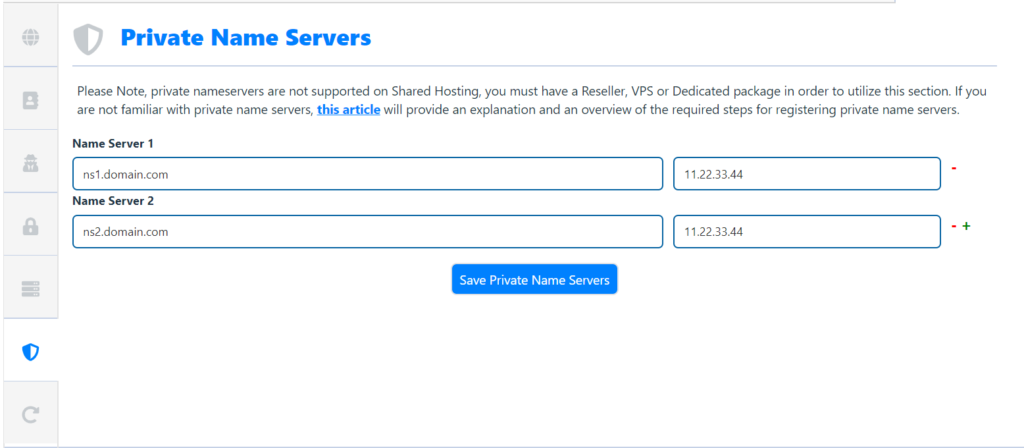
Add the following Private Nameservers records.
Add the ns1.domain.com and ns2.domain.com records for the given IP as follows.
Note: Please do not forget to change domain.com with your domain name and 11.22.33.44 with the given IP.
After adding ns1 and ns2 records do the following steps.
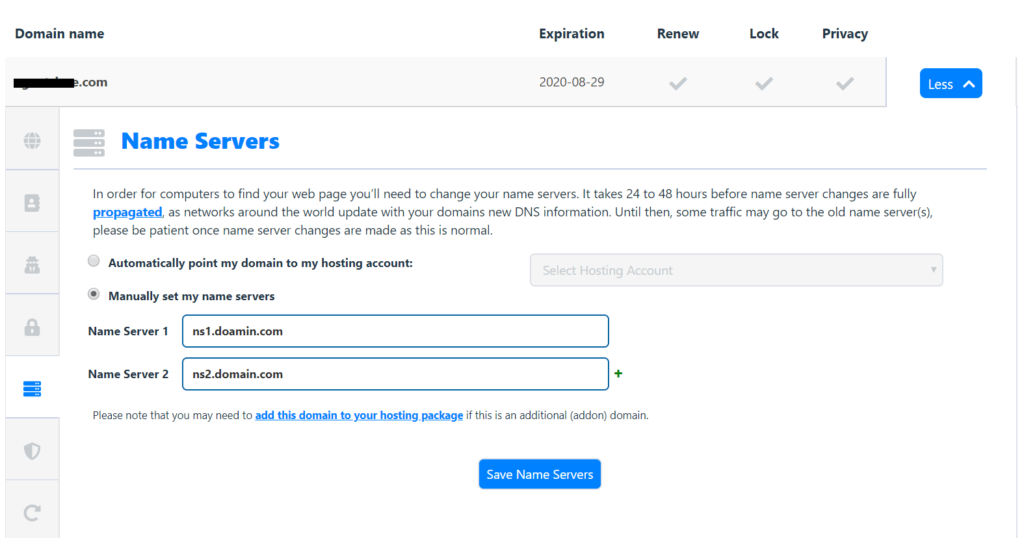
Change the Name Servers.
Go to the NameServer tab as follows.
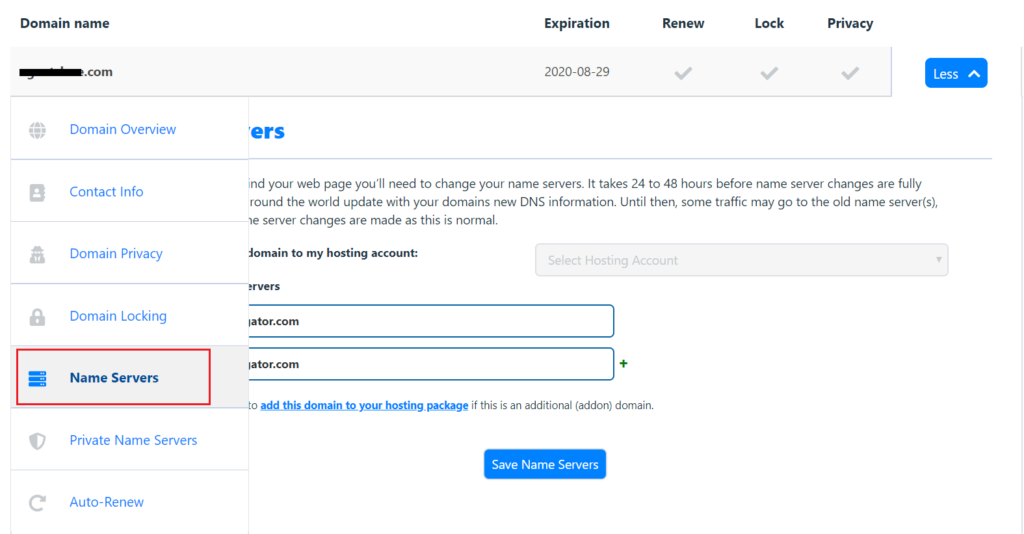
Change the records.
Old records:
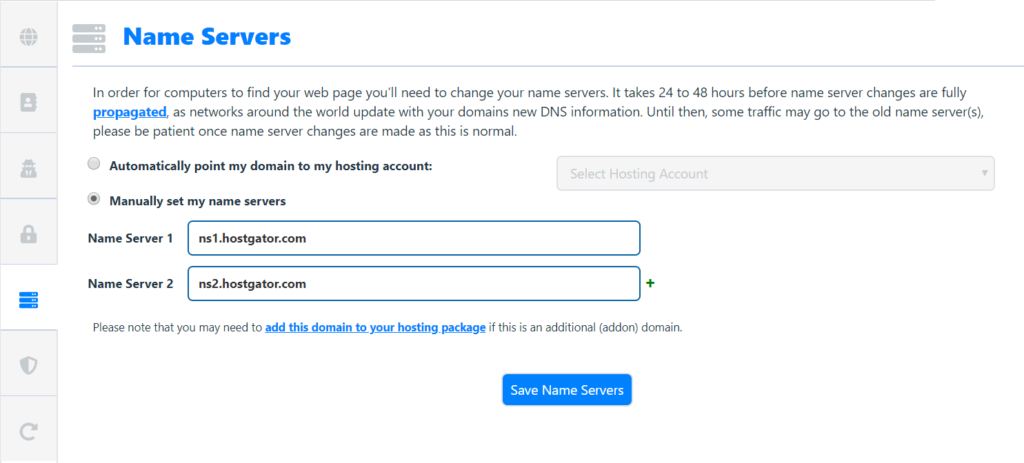
New Records:
ns1.domain.com
ns2.domain.com
Note: Please do not forget to change domain.com with your actual domain name.

Kuldeep Pawar
Kuldeep is a passionate and determined entrepreneur, building internet products since 2015.
He is currently leading the marketing & product management team for Goletro Technologies.
Let's Build this Thing Together!
1,632 Customers are already sending Millions of emails and generating tons of traffics for their business with BulkEmailSetup. Join The most empowered email sending provider.
BulkEmailSetup
Our aimed to offer a range of best-value products and services along with cutting-edge technology and dedicated round-the-clock customer support.
![]() © bulkemailsetup.com
© bulkemailsetup.com
1st Floor, EFC Tech Center,
JKInfotech 2, Phase 1 Hinjewadi,
Rajiv Gandhi Infotech Park,
Pune, Maharashtra 411057, India

This site is owned and operated by Goletro Technologies Private Limited