Admin (Reseller) Manual
Introduction
WYSIWYG – What You See Is What You Get. This is used to describe a web editor interface that lets you design newsletter templates using buttons similar to those found in a word processor such as Microsoft Word.
Examples of buttons include bold, italic, using headings, a button to insert images, and more.
Autoresponder – An autoresponder sends off an email to a subscriber automatically. A single autoresponder is most common – this typically just replies to a subscriber when they sign up. A sequential autoresponder is a little more advanced and allows you to schedule a series of predefined emails to be sent out on a specified schedule to each subscriber.
Email Lists – A list of contact email addresses, usually created by personal contact, subscribed, registered or customers that have purchased products or services.
Subscriber Lists – Lists that have been created by either in a physical store or website whereby email addresses were acquired by opt-in processes. Ex. A customer enters the store and provides an email address or a visitor on a website receives a newsletter, an offer of a discount, a free gift, information or other by providing an email address.
Unsubscribed Lists – Lists of contacts that did not ‘opt-in’, sign up, register or subscribe to giving out their contact information, including email address. These lists are normally acquired from the government or public lists that have email addresses exposed or from websites that have been ‘scraped’. It is critical that lists like these are verified and further, have a clear ‘Unsubscribe’ link to the email campaign.
List Segmentation – Send messages to subsets of your subscriber base to help establish a stronger connection via more relevant newsletters. You can target subsets of your subscriber base and mail out promotions and offers based on demographics, purchasing history, geographic location, and more.
Attachments – most EMSP’s do not allow attachments for a simple reason – they increase the probability of a given message being viewed as spam (as a result, the EMSP (and your) delivery rates may be affected. Attachments can also be flagged as computer virus files. You’re better off using inline links in your email, which you can then link to a hosted file. When the user clicks the link, they are given the option to download the file. Not as streamlined as an email attachment, but much more likely to allow the email to reach its full audience.
Spam Score/Checking – finding out whether your subscribers actually got your email is important. If they didn’t, why not? Some EMSP’s offer spam score utilities that help you determine the likelihood of your newsletter ending up in a spam box before you hit send.
Opt-In or Unconfirmed Opt-In: When an e-mail service provider requires an “opt-in” process, this means that e-mail recipients have agreed to receive e-mail advertising, e-mail marketing or e-mail communication specifically from the company or individual sending e-mails.
Double Opt-In or Confirmed Opt-In: When an e-mail service provider requires a “double opt-in” process that means that e-mail recipients have signed up to receive e-mail advertising, marketing or communications specifically from the company or individual sending e-mails. In addition, these individuals have confirmed (usually by clicking a link) that they did indeed, sign up to receive such e-mail communication.
List Verification – A process that verifies that email addresses exist. If a server does not respond or returns an email address does not exist, it is called a bounce. The higher a bounce rate, the higher probability of your email address being delivered to the spam folder.
Spam Triggers – There are a number of other ‘factors’ such as subject line words, use of emphasis (exclamation!), body context words (trigger words such as free, for sale, discounts that are considered off limits or dangerous.) For more information on trigger words see the following website that has some, not all spam trigger words – spamfilter_phrases.
You do not have to memorize this list, it is a list to give you an idea of what can trigger a message as spam. Using one or two of these phrases hardly places your message as spam. But when used in greater number with other factors it will. Spam triggers are also determined by not only ‘content’ words, but what is in headers, URL’s and the body. Again, you may want to take a quick glance at the following website.
Other factors include high send rates, messages marked as spam by receivers, the high number of images, etc. There are many factors.
Internet Protocol Address (IP Address) – This number is an exclusive number all information technology devices (printers, routers, modems, et al) use which identifies and allows them the ability to communicate with each other on a computer network. It is a number xxx.xxx.xxx.xxx (IP) that used to identify any entity in the network.
Static IPs are those IP which not change and fixed with your server which you get with VPS or Dedicated Server mostly.
Dynamic IPs are those IP which changes with the time mostly to hide user’s identity and these techniques require hiding their user’s identity while browsing the internet and dynamic IPs are not good for mailing since you can set their rDNS and they treat as spam if you will send an email with these dynamic IPs.
Domain Name System (DNS) – This allows the IP address to be translated to words. It is much easier for us to remember a word than a series of numbers. The same is true for email addresses.
1. Dashboard

The Title Bar at the top of the Dashboard is for quick links and your account settings.
![]()
1. Customer Area icon is simply a ‘home’ link, available on any page to take you back to the Dashboard.
2. Collapse icon ‘hides’ the left menu to give you more workspace in the main body.
3. Your name in the upper right has two links, one to your ‘My Account’ settings and the other ‘Logout.’
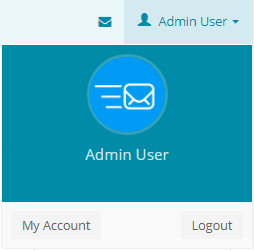
a. Logout – It is important that if you are using an office computer or a public computer that you log out of your account or your account profile – email, password and other private information such as all customer information would be at risk.
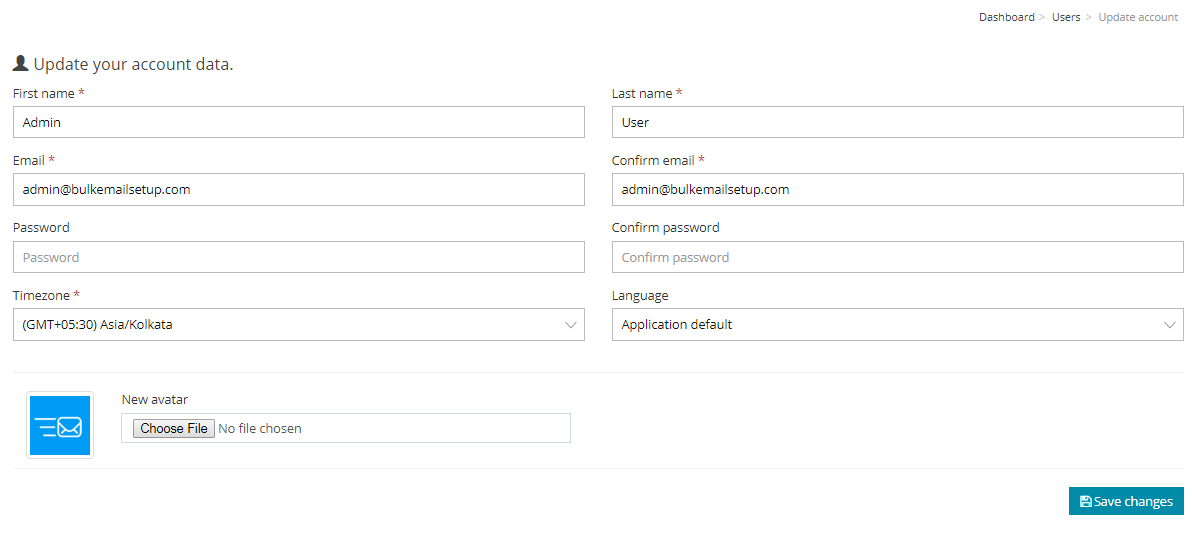
b. My Account – Has two tabs, each one is very important information that is used for your templates and the Campaigns you create. Without some of this information, you will not be able to finish building a campaign, which goes without saying, you will not be able to send a campaign.
Profile tab – Includes First name, Last name, Email, Password, Timezone, Language and a Browse button so that you can upload an image of yourself. You must use your email address and assigned password that matches your email password.
a. Customers
b. Campaigns
c. Lists
d. Subscribers
e. Segments
f. Delivery Servers

For example, if you have sent out 10 customers, you will be able to see their active at once in this summary area.
Similarly, you can see the other activity with respect to what you recently did, such as Campaign, List, Subscriber, Segments, and Delivery Servers with each expands.
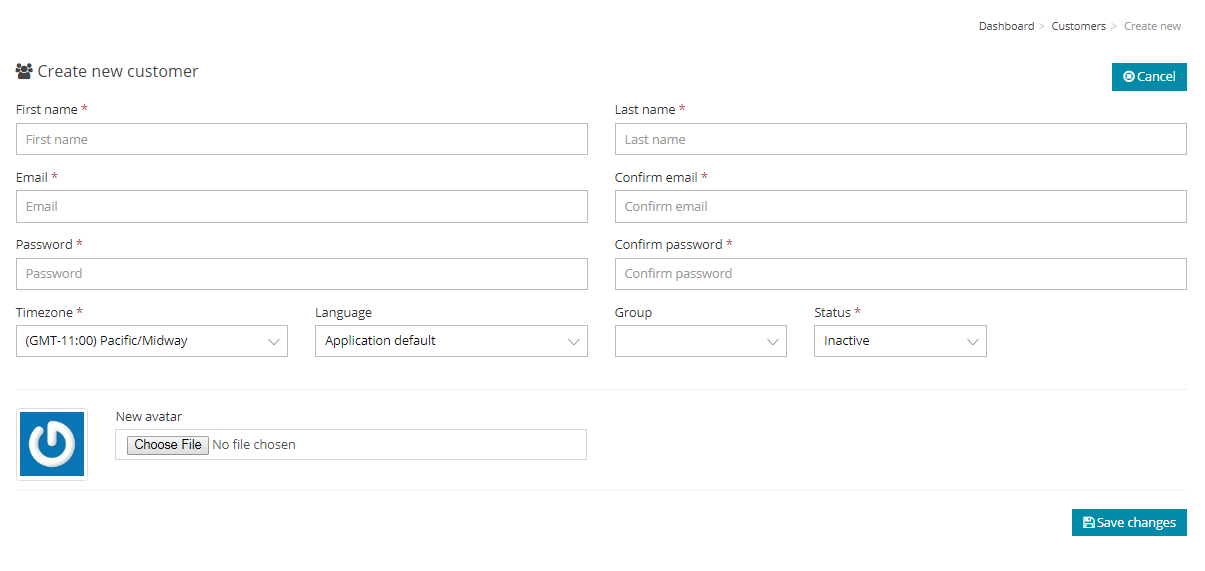
2. Customers
For ex. if you want to share this setup and want to resell to multiple customers or users so you can create different-different users here with the restrictions and assign email quota with this option.
You can restrict them on number of servers, email limit per hour or per day etc.

You can update any existing customer profile as well, you can update their personal details or Groups or Status.

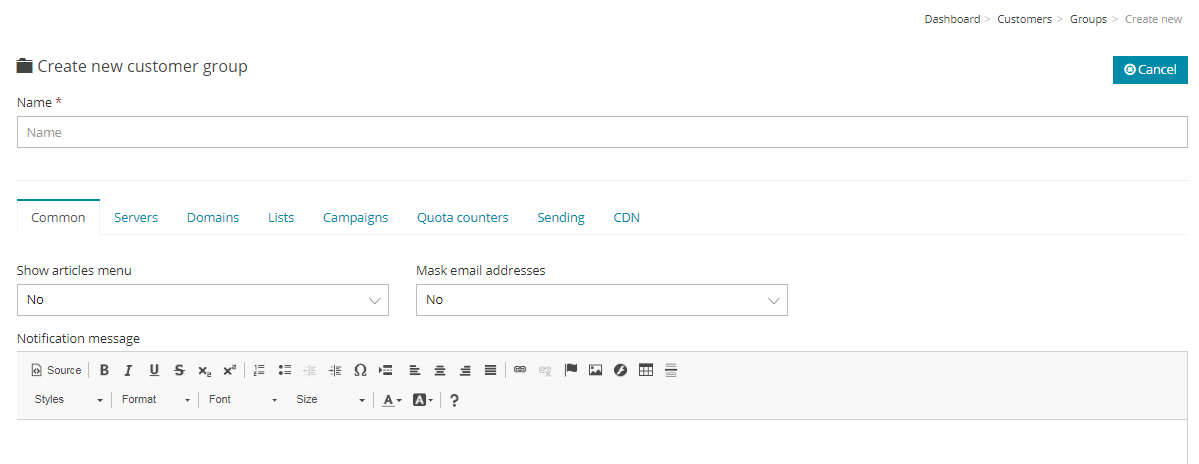
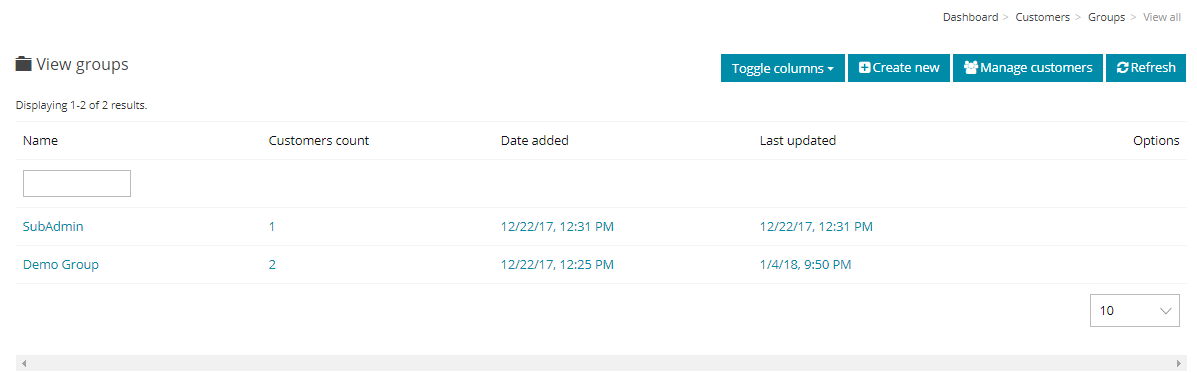 With Groups you can add the following restriction to your different customers.
Common:
You can show them for the visibility of your create articles.
Also, you can mask the emails in case if you created any demo or much restrictive account with email masking.
Server:
You can set the limit on a number of servers any customer will get in case if there are more number of delivery or bounce processing server.
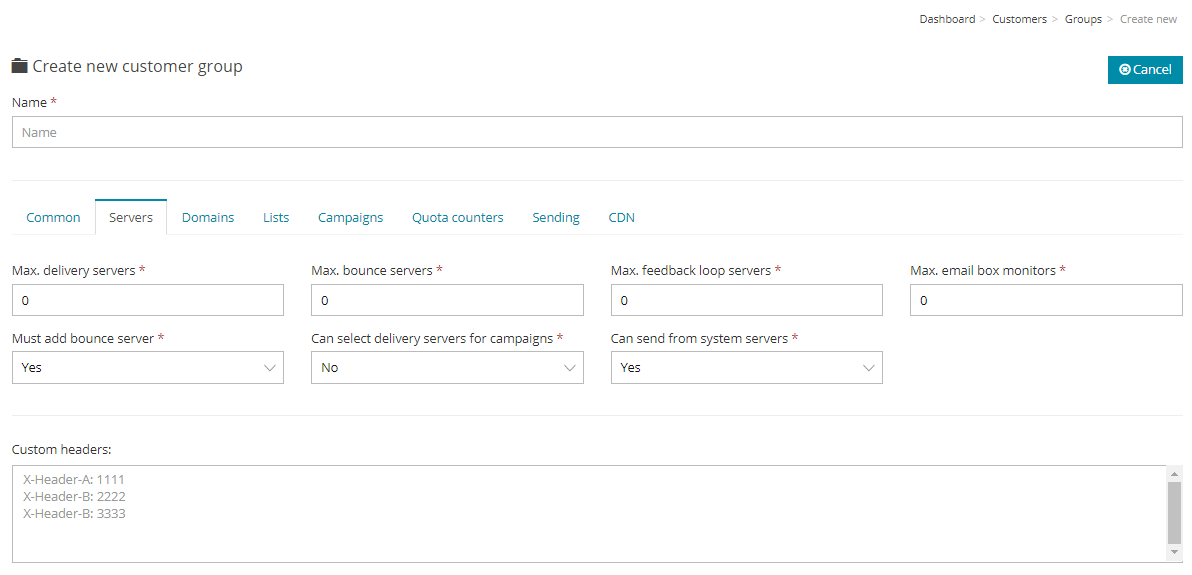
You can also manage if that you want to allow your customer that if they can select the delivery server (if there are more than 1 server) before sending an email campaign.
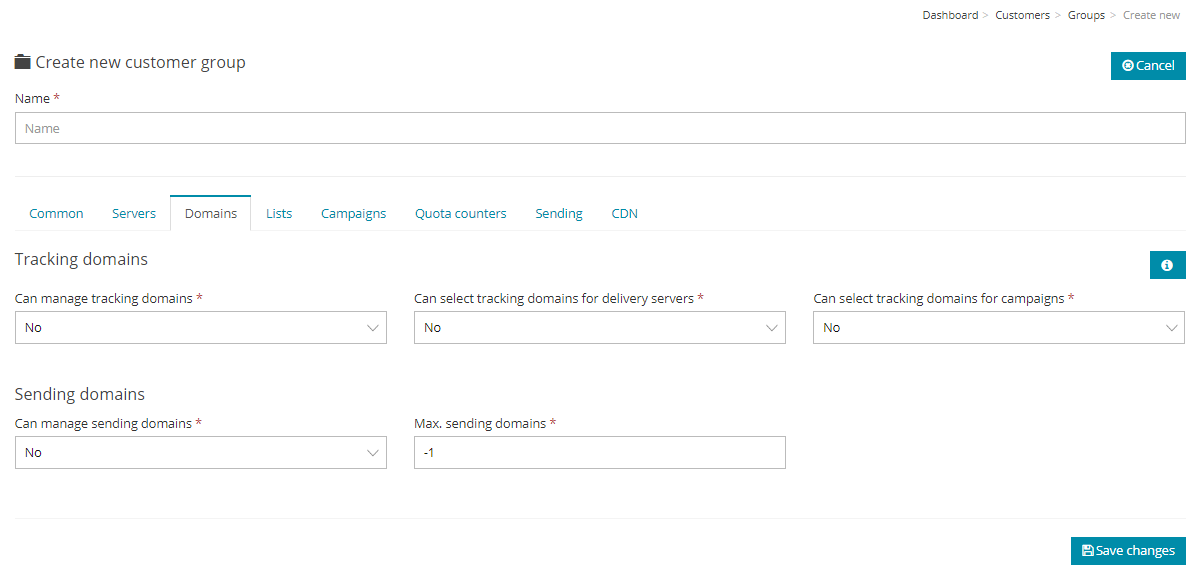
Domain:
You can add multiple domains with higher plans and used them with different servers in this application.
So in case, you want to put restrictions on sending domain, so you can put the restriction herein domain section.
List:
As an admin you can put the restriction on your clients like what they can do with their list, you can enable/disable import, export, copy list option. You can also restrict your customer on how many maximum lists or subscribes or segments, they can create.
This will be useful if you want any restrictions on the number of subscribers to your users as the most of email service providers are doing it.

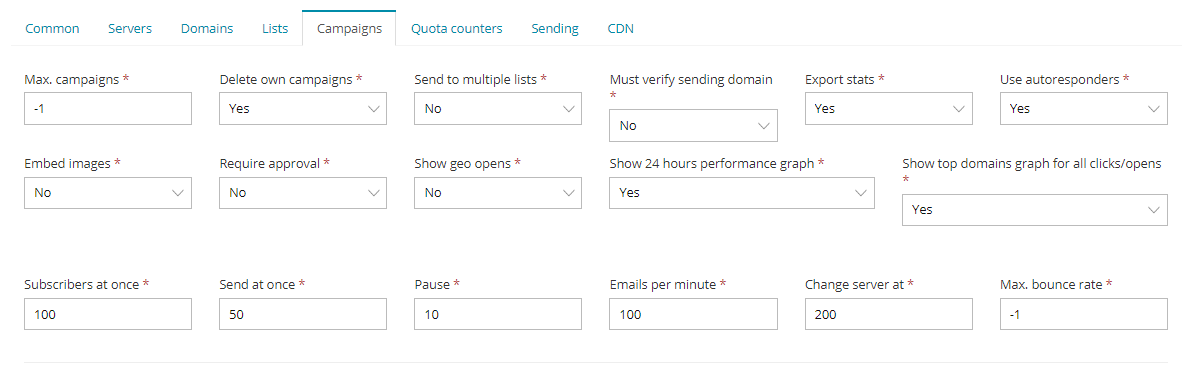
Campaigns:
Similar to the Lists option you can restrict your customer for campaigns as well, like how many they can create, they can delete it or not and send to how many lists at once.
Most of the options are self-explanatory and you can leave the default option at the bottom set of subscribers at once and Send at once or paused limits option.
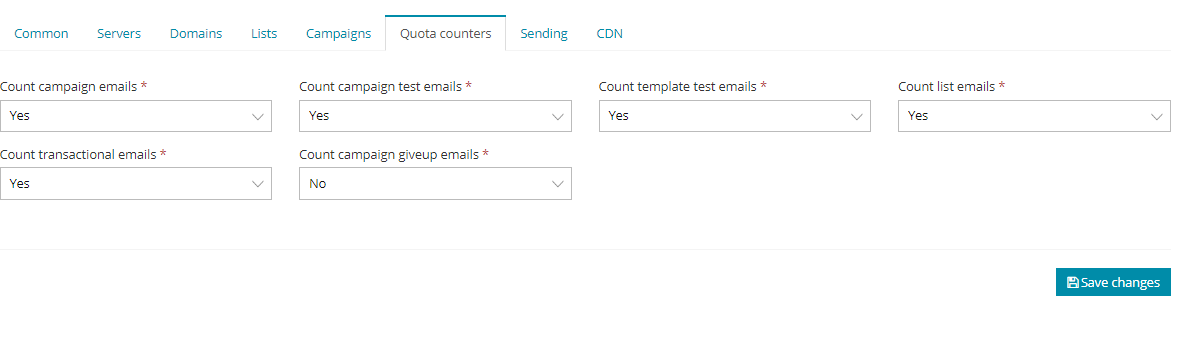
Quota Counter:
You can set the limit of the number of emails and you can enable/disable the quota counter for any customer with this option.
You can define here for which type of email campaign you want to enable/disable the email quota.
Sending:
You can put the email restriction based on your time unit that could be a day, a week or a month etc.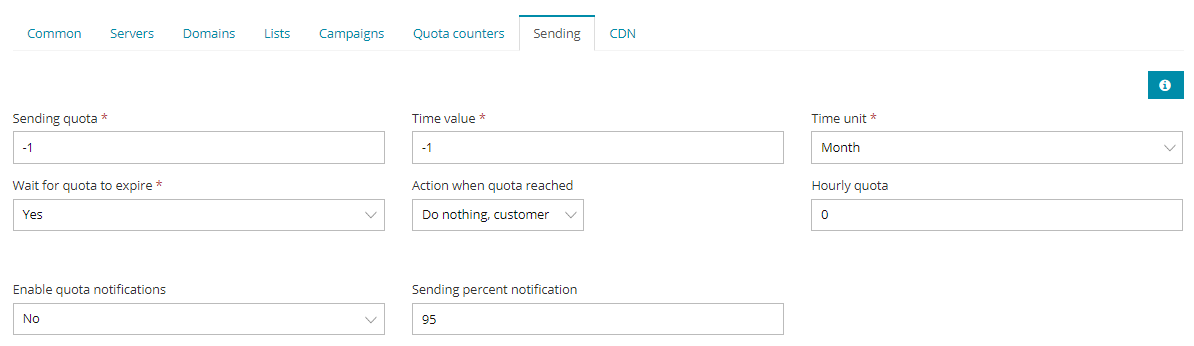
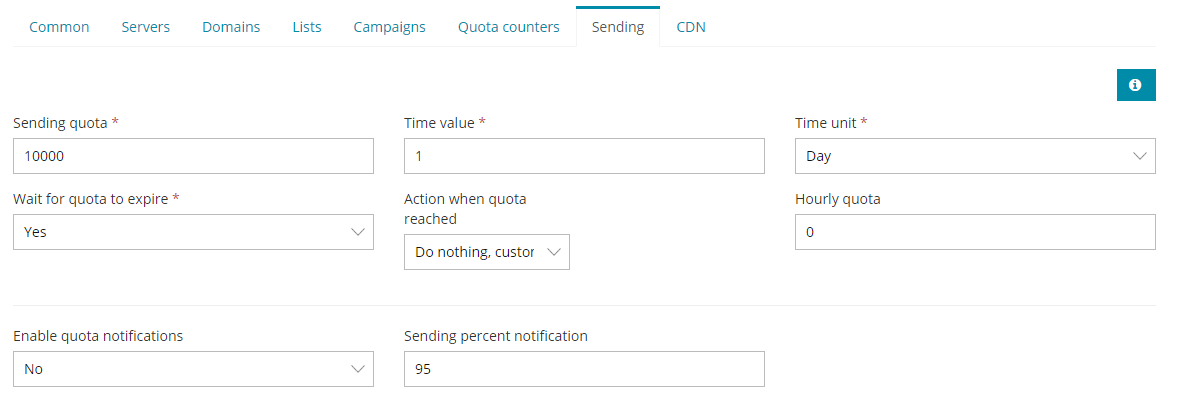
For example:
If you want to assign someone 10k emails for one day, you can use the following setting.
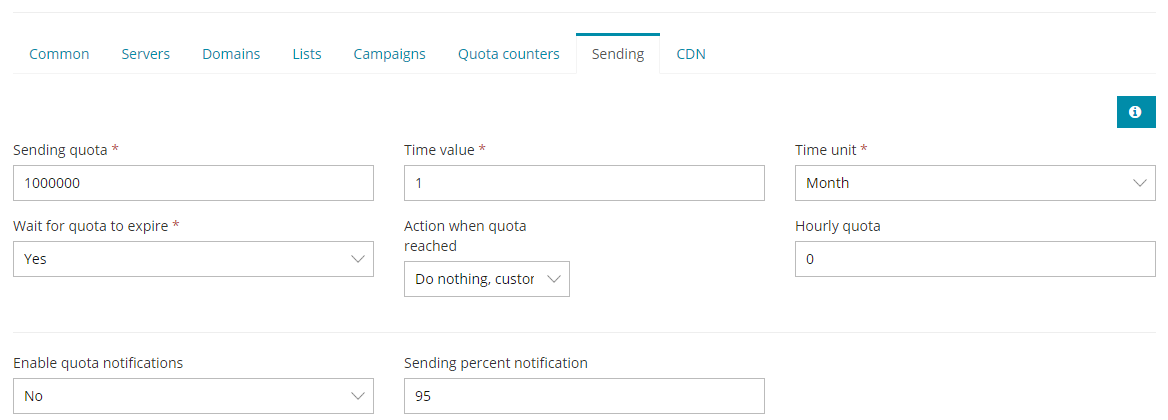
Or
If you want to assign someone 1Million emails for one month, you can use the following setting.
3. Servers

This configuration we will do it for you so you do not have to worry about.
Here you can add different-different email sending server, bounce server, and feedback-loop servers and assign them to the different-different customer you have created.
We will add here your email delivery servers.
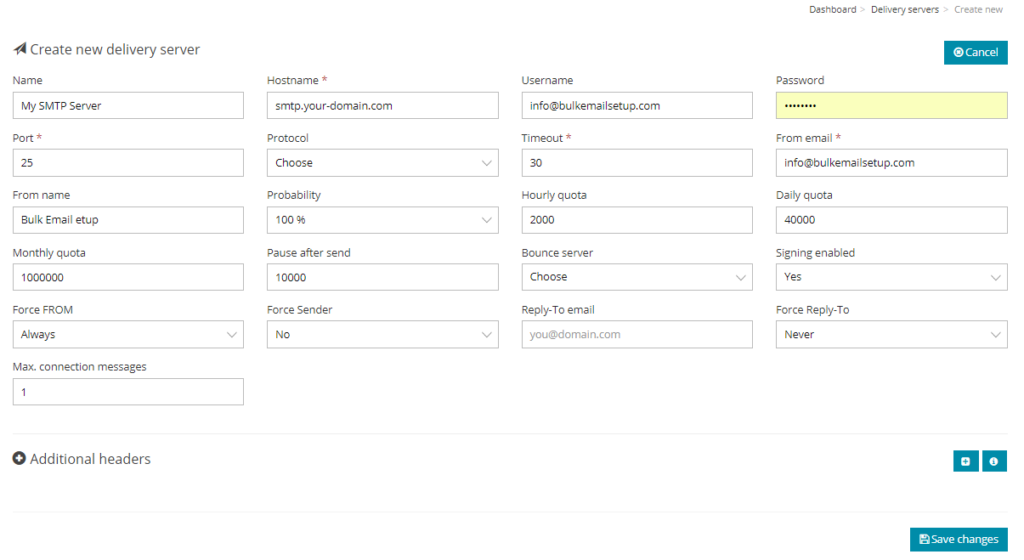
Delivery servers
Delivery servers are responsible for delivering emails to subscribers.
You can add them and assign sending limit per hour and per day and interval in between each email send for the delay in between emails.
You can set the From Name and email ID from which you want to send emails to each server.
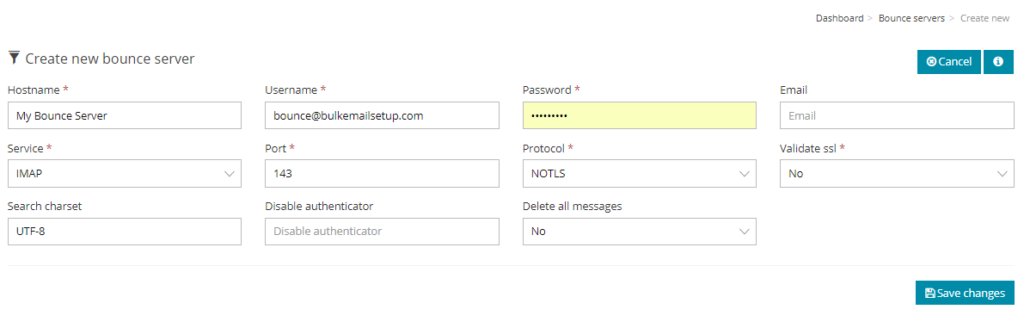
Bounce Servers
We will configure your bounce email server as well here for each SMTP server and add them to their respective email SMTP server for bounce processing.
Bounce servers are used to take action against the email addresses of the subscribers that bounce back when campaigns are sent to them.
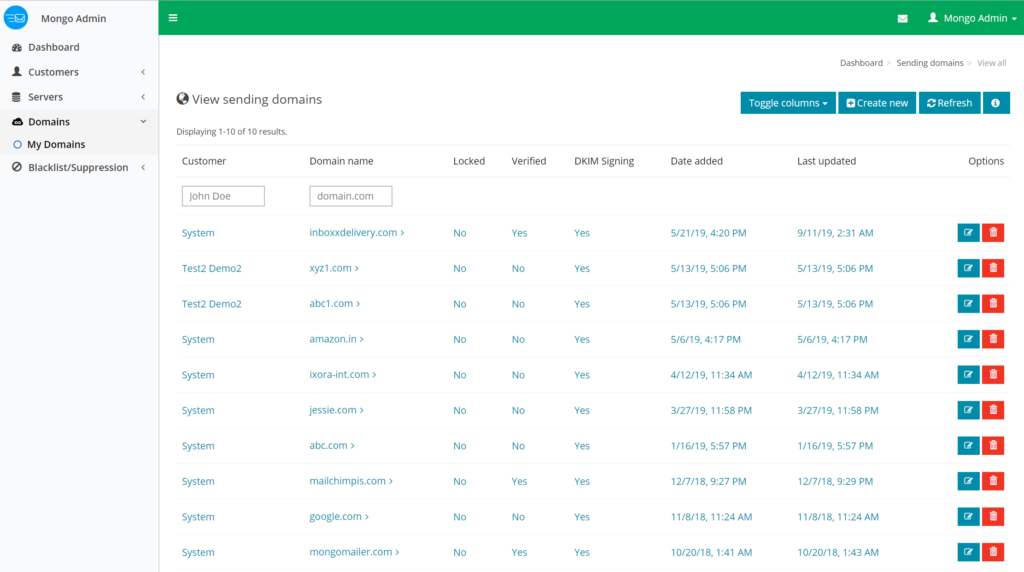
4. Domains

You can multiple sending domains as well as following.
https://www.bulkemailsetup.com/crm/knowledge-base/article/how-to-add-domains
5. Blacklist/Suppression
Start adding emails the global email blacklist to prevent sending to them or being added to the system from email lists, registrations and so on.
This is a global email blacklist that applies to absolutely each email from the system.
If you do not want to send email to any some particular email IDs or to a specific domain you can add them in your central blacklist, so your customer will not able to send any emails even if they included in their contact list.

You can import the complete files full of emails as well if you want.
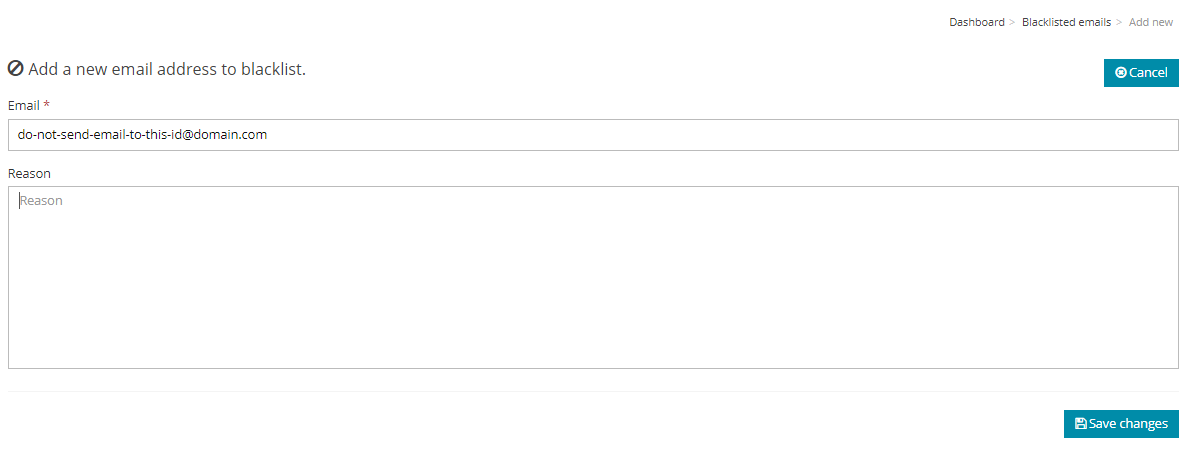
The System will also add the email time to time while sending emails to those such IDs based on ESPs response.
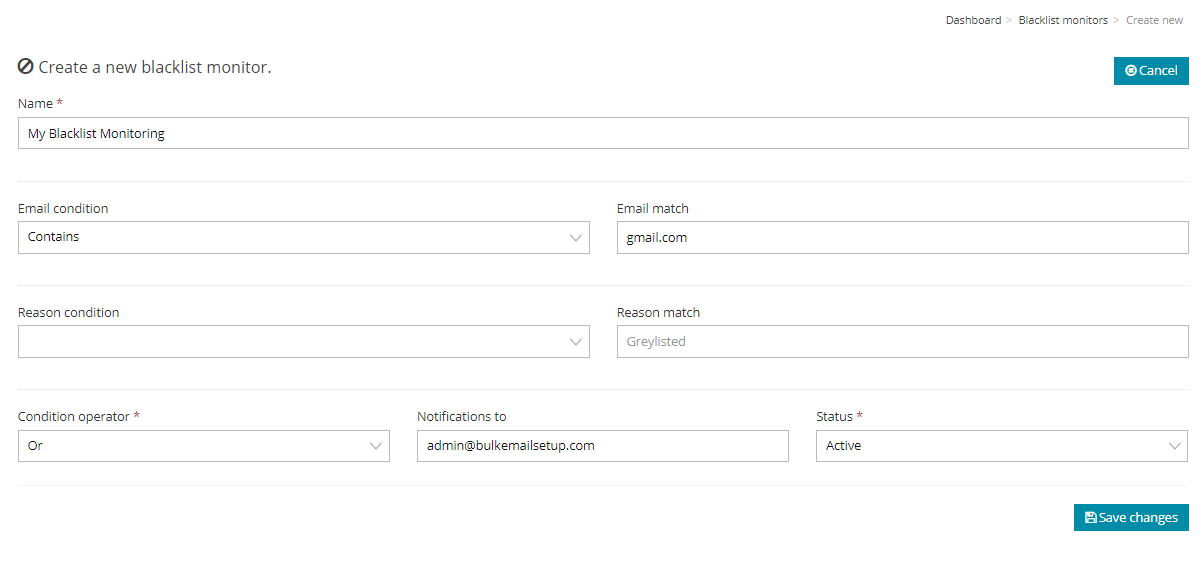
Sometimes, emails can be automatically added to the global blacklisted for false reasons and when this happens, you need a way to monitor the email blacklist to remove such false positives.
You can create the condition and if such condition meet you will get notifications for the addition of any new emails in your list with that particular condition which you have provided.
For example:
If you want a notification on an addition of a @gmail.com ID in your blacklist, so you can use this option for that.
Let's Build this Thing Together!
1,632 Customers are already sending Millions of emails and generating tons of traffics for their business with BulkEmailSetup. Join The most empowered email sending provider.
BulkEmailSetup
Our aimed to offer a range of best-value products and services along with cutting-edge technology and dedicated round-the-clock customer support.
![]() © bulkemailsetup.com
© bulkemailsetup.com
1st Floor, EFC Tech Center,
JKInfotech 2, Phase 1 Hinjewadi,
Rajiv Gandhi Infotech Park,
Pune, Maharashtra 411057, India
This site is owned and operated by Goletro Technologies Private Limited